Showing posts with label dollar nail art. Show all posts

2.06.2012

Zoya Charla + Gradient Nail Art

Hey there!

My manicure for today, I pretty much outright copied from a fellow blogger. But I liked it so much I couldn't help myself! And I will go ahead and say that I love her version many times more than mine! My inspiration for this comes from Jacki at Adventures in Acetone. She has fabulous ideas, and if you aren't following her yet, ya should be!! :)

I loved the idea she had to do a blue/purple gradient...especially with these Zoya colors in matching finishes it really spoke to me...so I used Charla for my base. This is one of my very first Zoyas and this baby is still sparkly and pretty as ever! 


I love the greenish shimmer it has!


Next, I sponged Zoya Julianne at the tips into a gradient. I like that sponging allows for mistakes because it still looks good even when imperfect (like mine!). After the gradient was finished, I topped it off with Ozotic 528, a pink/blue/green color shift glitter topcoat. Again, I have to give credit to Jacki for this genius combo! It may not look like much here, but it adds just the right amount of sparkle to these colors that is just perfect.


And finally, I used Wet n Wild Silvivor to stamp in this marbly type design. I was happy with how this all turned out and loved the overall look.


Jacki, if you are reading this I hope you don't mind I used some of your ideas! Thanks for having such a great blog to get inspiration from! :)

Pin It
Pin It!

8.02.2011

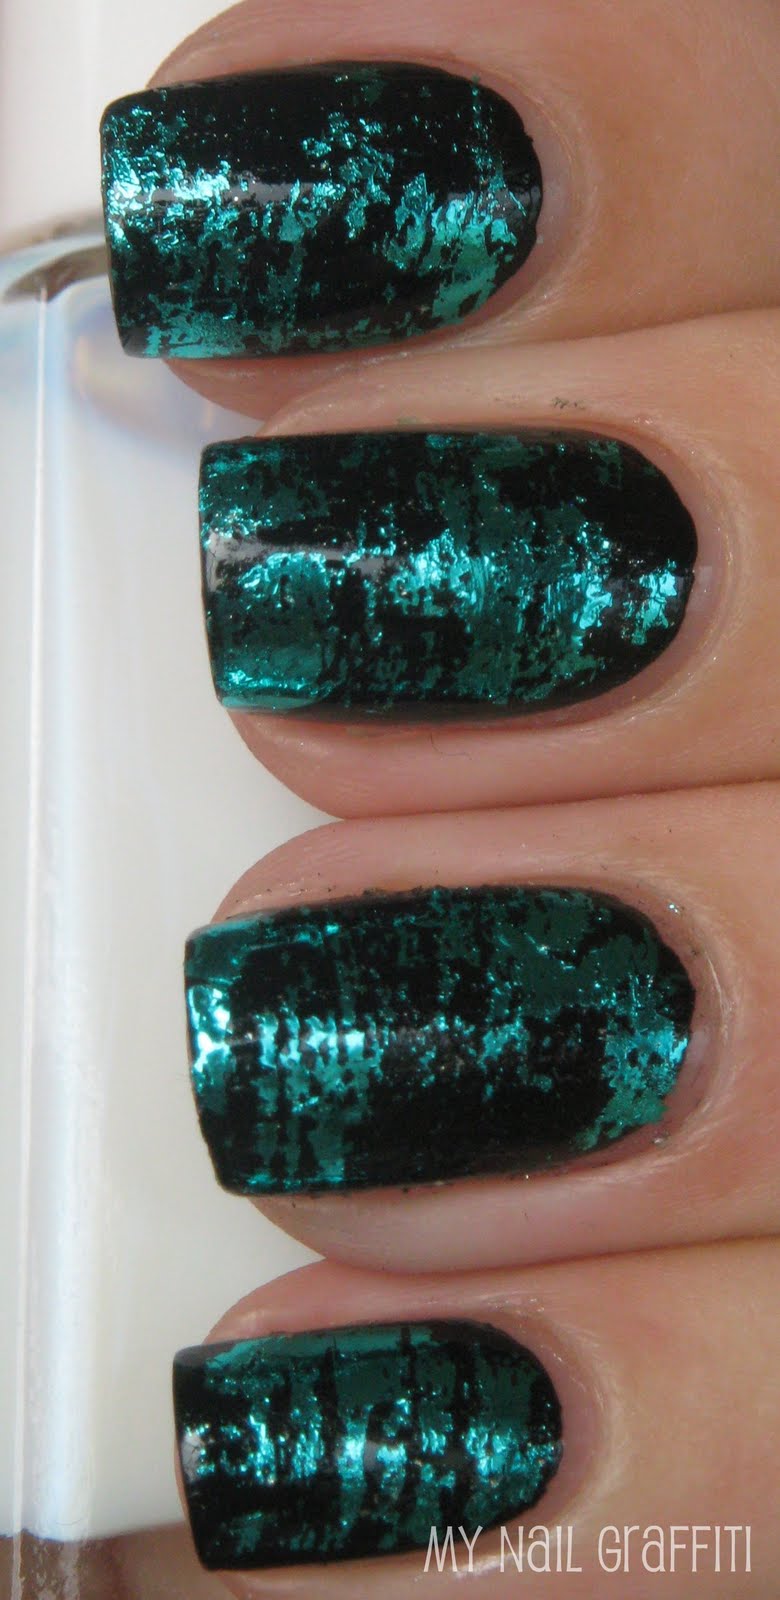
Teal Nail Foil Crackle

Hey! I have more nail foil crackle to show you today. I don't use these as often as I would like, probably because they usually don't last very long, but they are super fun to use. I made a tutorial a while back for how to do this look. You can find that HERE! :) 

So using that same method, we used Wet N Wild Wild Shine in Creme Black as a base. And then teal nail foil from Dollar Nail Art.  This actually lasted me longer than I thought...even throughout handwashing and a shower. I have read that fast dry top coats don't play nice with foils, but since I wasn't planning on keeping this mani for long I tried anyway. We used Poshe Fast Dry Base Coat on top and it worked really well! Who would have guessed?


That's it for today! Have a good one! <3
Pin It!

5.13.2011

Nail Foil Crackle Tutorial


Well it looks like Blogger is kinda back to normal...so I am posting yesterday's post today. I noticed my giveaway post is gone, but I know Blogger is working on restoring it. For those who have already entered my giveaway since yesterday (May 12) , I have your entries recorded. 

On to the fun stuff! I have my first tutorial for ya'll today! I had some requests for tutorials as well as how to use nail foils, so we combined the two. I started with Sinful Colors Forget Now as the base. It's a berry pink with purplish glass flecks in it.


I think the name is really weird, and don't see what it has to do with a nail polish, but that's ok! :P Application was good in 2, but perfect in 3 coats.


So once you have your base color, the next 2 photos show the materials you need.
I got the foils and adhesive from Dollar Nail Art. Obviously, pretty much everything there is $1, but last I checked you have to make a $25 minimum purchase. But that just gives you an excuse to get lots of fun things! :P Besides foils they have lots of other nail art stuff.


Next, cut of a decent sized strip of foil. Brush adhesive on the paper to roughly the size of the strip you cut. Put your foil strip on top of the adhesive and once you have it all down pull it off quickly. Your paper should look like this:


Now paint your nails with the adhesive. It goes on like a milky whitish color, but dries clear. (But don't let it dry before the next step!)


Right after painting, take a sponge and dab your nails. Let the adhesive become clear, but don't wait too long or it will dry.


Cut off a nail sized strip and place it on top of your nail. Push the foil piece down onto the nail. Sometimes it helps to get a cuticle pusher to smooth it all down securely.


Immediately after it's all pushed down the way you like it, pull the strip off and you get this!


Dustin came up with this idea. He was very proud of himself! :P


It's an alternative to the crackle look that every polish company is jumping on the bandwagon with. Personally, I like this better!


*Tips and Tricks*

-Nail foils don't last long at all. I would recommend them for a special occasion, or if you do your nails daily. 
- Foils last longer on toes. (For me personally)
- Use the most basic top coat you can find. It's kind of hit and miss as to which ones are compatible with foils. Some, (especially fast dry) will eat at the foils. In my experience, the cheapest, most random one I own works best.
- If you want to cover your whole nails with the foil, paint a similar color underneath, that way any foil chipping/mistakes blend in better.
- Be creative! There are so many ways to use these, but there is definitely a learning curve. 

If any of you try this, I would love to see it!

Pin It!

2.03.2011

First Attempt at Nail Foils...


...ok so this is really our second attempt, but the first was a pretty much a total fail that would make a mockery of what my blog is trying to accomplish. :P Dustin found DollarNailArt.com is where we got these foils. There is a 25 dollar minimum purchase but you can get a lot for that price considering everything is a dollar! The foils definitely a learning curve...luckily my talented hubby mastered it pretty quick. I thought these turned out well for only a second try! This is the passion pink foil  before the Konad stamping:

I don't put too much thought and work into deciding what to stamp because the foils don't last longer than a few days. I noticed that they stay a lot longer on toes though. 

                                                  Konad White special polish and plate M61
Pin It!